Homepage
Home• Biography Homepage Contacts• Photos

All posts by admin

The making of a cello: applying the ribs on the shape

April 3, 2011Cellos, Processing stepsadmin

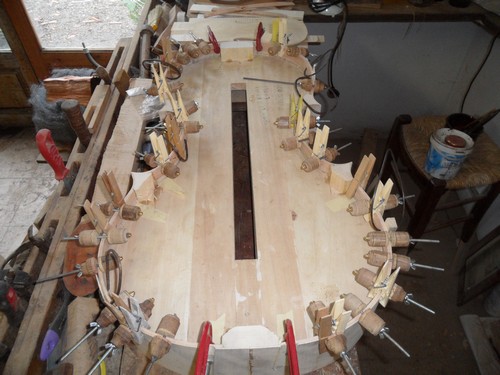
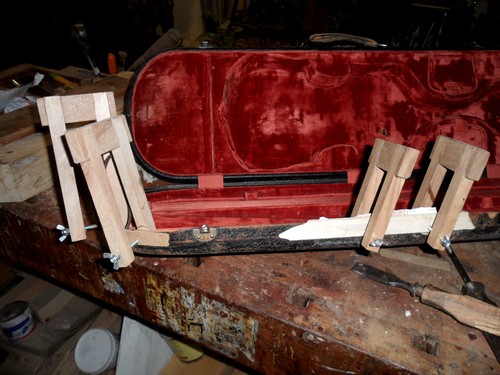
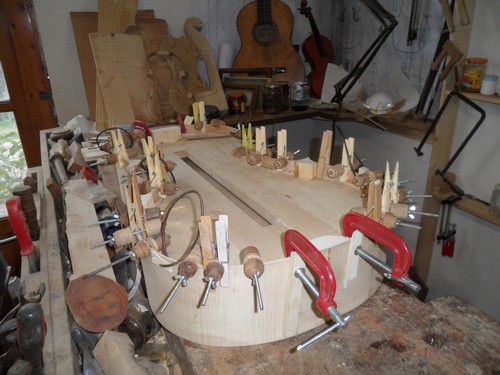
Starting from the positioning of the blocks, formerly of poplar or willow, (here made of spruce), after having carefully positioned and glued them with a few drops of glue on the form, I proceed with the shaping using a narrow blade. I prepare the ribs, usually from maple, levelling them with a planer and finishing with a card scraper, paying attention to the regularity of the thickness. To glue the ribs, I start from the inside of the C-bouts and then move on to the upper and lower ones. I continue the work with the gluing of the linings, starting from the side of the back. The lining used are made of willow and to facilitate the bending I have used the usual heat technique used for the ribs. The tools I used are steel springs and various clamps.

The making of a cello – part 1

March 3, 2011Cellos, Processing stepsadmin

The first step of the construction begins by coping the outline of the model on the board. Along the perimeter there are recesses, where little blocks are put, in order to apply the button, the neck and the ribs later on. To cut out the shape, I used a mechanical band saw and then carefully refined it, using a rasp.

Manufacturing a cello from Montagnana’s 1740 model

February 20, 2011Cellos, Processing stepsadmin

The shape on which I built the cello dates back to 1740, a work by Domenico Montagnana, one of the most famous luthiers of his time, born in Lendinara on 25 June 1686. He was linked to the workshops of some of the most important luthiers of the time, such as Pietro Guarnieri and Matteo Gofriller, but what really made him famous was the quality of his own cellos.

There are various techniques used over time, which provide either the use of an external or internal mould : I chose to work on this instrument using an internal one. The shape of the violin can be made from hardwood, but I decided to use softwood blockboard instead. Its crossed grain allows us to avoid warping and shrinkage.

The making of a chinrest

February 7, 2011Processing steps, Violinsadmin

The precious woods that are used for the construction of the chinrest are boxwood (box shrubs are evergreen Mediterranean plants), very hard and yellowish in color, ebony (from Malaysia, India, Indochina and Africa), black, hard and heavy to the point of not being able to float. There’s also varieties of ebony with dark brown grain, especially in the Madagascar area. Rosewood is another suitable choice, hard and warmer in color, with visible light grain. Pear tree (native to central-eastern Europe and Asia Minor) has a compact, fine-grained wood of a warm, reddish colour, overall easy to work with.

In the past, great luthiers used to prepare pear purflings, due to the ease with which pear wood absorbs any colourant. Usually the wood used for the chinrest is left-over wood from the construction of other components such as pegs, tailpiece and buttons. There are various models: Dresden, Hill, Flesch, Cavalcante and many others. The piece in the video is made after Guarneri’s type and customised by me.

Restoring a violin case: a look over the whole process

December 30, 2010Restorationsadmin

In the photos you can see the worn and the broken parts the case, where to carry out restoration work. The damaged parts are carefully restored by gluing the various missing parts with clamps. Afterwards, when the glue has been dried, these newly added pieces are shaped with various tools to fit the shape of the case.

The restoration proceeds with the consolidation of the worn parts: for this work a putty based on glue, previously sifted sawdust and black oxide is used as a wood filler.

The restoration is finished by sanding the putty with fine-grained sandpaper before finally painting and varnishing the case.

Posts navigation

← Previous posts
Next posts →
© 2025 Stefano Marzi Via Terrossola 58/H, 52011 Bibbiena (Arezzo) ITALY